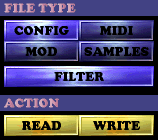


This is where all the reading and writing of files in 2MIDI takes place. To read/write a file, first you must select which type of file it is that you want to read/write. Then you can use the file selector to select a file, or you can enter a path and filename in the path box (at the top of the file selector)
CONFIG
You can READ and WRITE the configuration information used in 2MIDI. The config files contain the settings for all the options in 2MIDI, including the channel, effects, sample, and MIDI options settings. When you load 2MIDI for the first time the default configuration is loaded. Subsequently, every time you load 2MIDI, the configuration last used is loaded. The configuration is not automatically saved when you exit 2MIDI, so if you want to keep any changes that you've made to the configuration you have to WRITE them. If you have already loaded a MOD file then you should reload it after you READ a config file, unless the config file is specifically for the loaded MOD file, in which case it must be loaded after the MOD file.
MOD
MOD (ProTracker/NoiseTracker/SoundTracker/etc...), XM (FastTracker 2), IT (Impulse Tracker), S3M (ScreamTracker 3) and MTM (MultiTracker) files are supported by 2MIDI. Select the file using the file selector, and then use the READ button to load it into 2MIDI. To listen to the selected file, press PLAY. Press PLAY again to stop it.
MIDI
Enter the MIDI filename in the path box, and then use the WRITE button to write it. Switch on the AUTO switch to have 2MIDI automatically write the MIDI after conversion.
SAMPLES
Use the file selector to select a directory for the samples to be exported to. You can also supply a prefix for the sample filenames on the end of the directory name. For example, if exporting WAVs and there are two samples (with patch numbers 0 and 1), a path of
FILTER
This option will make the file selector list only those files that are
of the chosen type.
READ
Read the file.
WRITE
Write the file(s).
AUTO
Makes 2MIDI automatically write the MIDI or samples to disk immediately after conversion.
PLAY
Toggles playback of the selected MOD file.

SCAN NETWORK
If this option is on, 2MIDI will scan for drives on any networks that the computer is currently connected to. The drives will then be accessable in the file selector.
OVERWRITE
This makes 2MIDI overwrite existing files, without asking first.